Materials for Fabric Printing: The 7 Essentials
I know a thing or two about the required materials for fabric printing. In fact, during my college days as a fiber art student, printing on fabric was a favorite technique. I’d channel my inner Andy Warhol as I dreamt up designs, mixed my paints, and pulled the squeegee across screens. Now, years after graduating, I still wish I would have used that college studio to its fullest potential and pursued more of the ideas I was cultivating.
While I may no longer have access to a studio dedicated to various fiber art processes, printing on fabric is something I can do anywhere—even at home! With just a few essential tools and a dash of expert instruction, anyone can add screen printing to their repertoire of surface design techniques.
Karen Lewis, a self-proclaimed screen printing and fabric addict, shares more than a dash of her vast screen printing experience in her book, Screen Printing at Home. Getting set up for success is a key ingredient to a fun and productive screen printing session! To get started off on the right foot, here is an excerpt from Karen’s book you won’t want to miss:
Essential Printing Materials
1
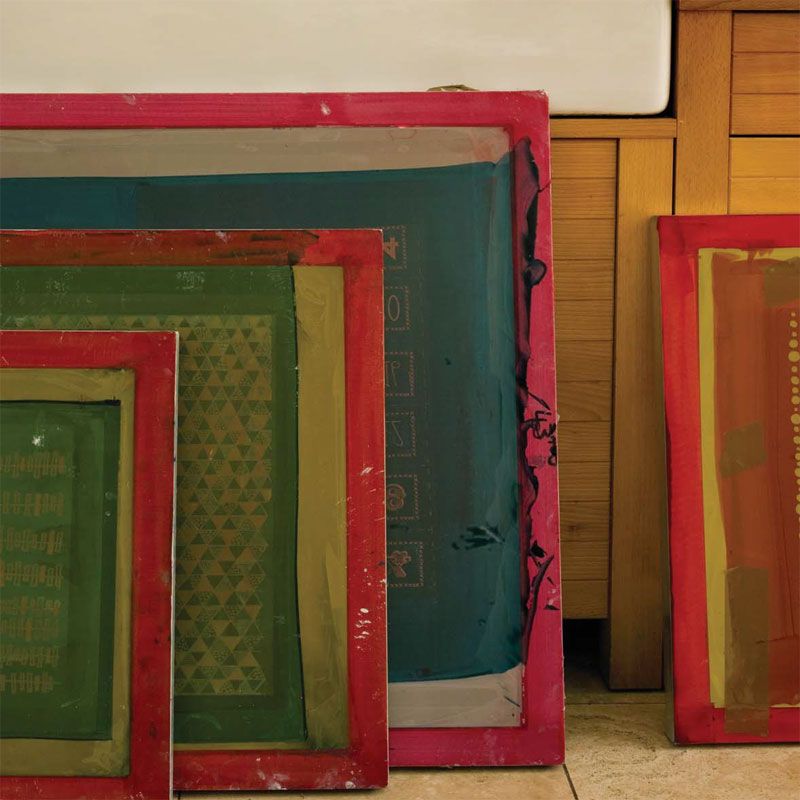
Screen Printing Frame: I would always suggest choosing an aluminum frame, as this dries much quicker after cleaning than a wooden frame, and it can be wiped down so you can use it again sooner. They are a little more expensive than wooden screens but wood can be prone to warping, so aluminum is a better investment. Always choose a frame as big as your space allows.

You don’t need to use the entire size of your screen for every design, but this does give you the flexibility of making bigger prints if you want. Maybe you only have a tiny space to print and no suitable area to wash up? A fantastic method suitable for any space is to use an embroidery hoop with muslin (cheesecloth) fabric stretched tightly across instead of a full sized screen. [Don’t miss Lynn Krawzcyk’s tutorial of embroidery hoop screen printing for more details!]
2
Mesh: is the woven fabric that is pulled tightly across the screen printing frame, and frames can be bought with this mesh in place. Historically, this was made from silk, hence the name silk-screen printing. Nowadays, the mesh is generally made of polyester. Mesh comes in a variety of thread counts, a little like bed linen, which describes how many strands per inch are in the mesh fabric. A lower mesh count has fewer strands and therefore wider spaces between them.
The ink flows through the screen more easily with a lower mesh count, so this is generally used for less detailed artwork and printing onto rougher or more textured surfaces like fabric. A higher mesh count has less space for the ink to flow through, so is generally used for more detailed artwork and smoother surfaces. For printing onto fabric I would recommend a mesh count of about 110; as a beginner, you will find this is more than adequate for different textured fabrics that you may use. If you find your designs are very detailed you may want to try a higher count.
3
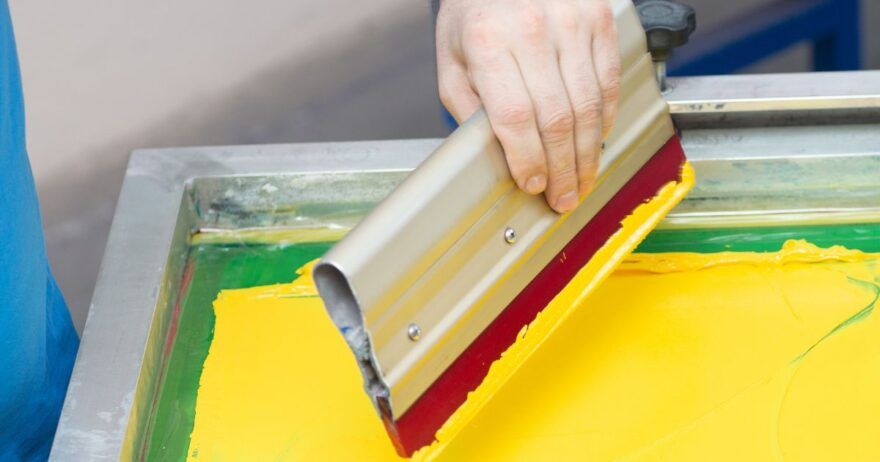
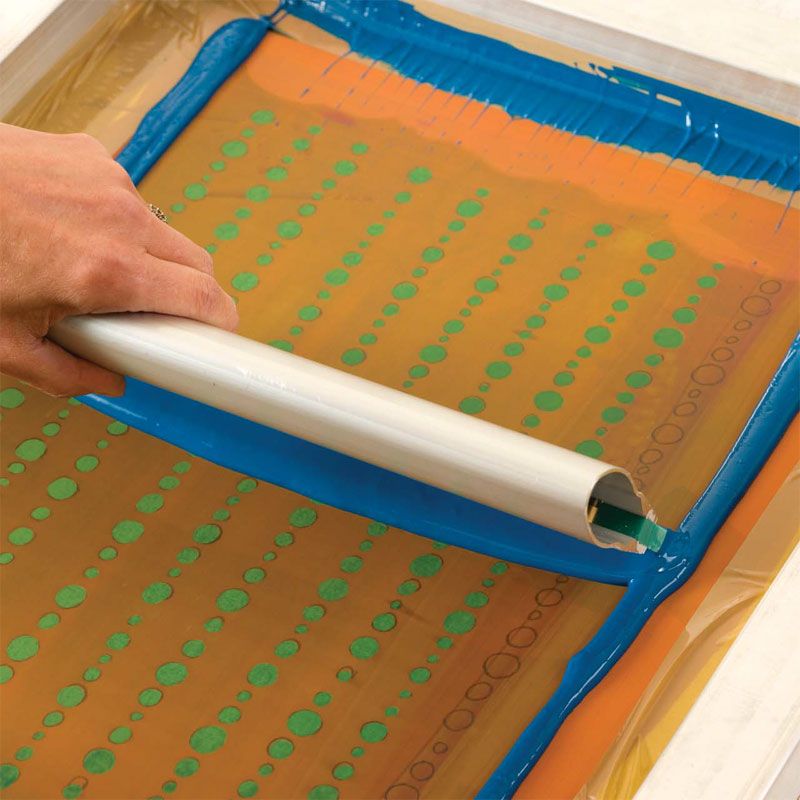
Squeegee: A screen printing squeegee is a very firm rubber blade that is attached to either a metal or wooden handle. Again, I would opt for investing in an aluminum one for the same reasons as an aluminum screen. The size of the squeegee is very important. You need it to pull across the width of your design with a little overlap to ensure a clean print, as well as being a couple of inches narrower than the width of your screen to allow for the ink to be pushed outwards as you print.
4
Inks: You can use water-based acrylic inks or oil-based Plastinol inks; like anything it is down to personal preference. I like to use waterbased acrylic inks as they have a softer finish and sink into the fabric, unlike Plastinol ink that sits on top of the fabric, giving the print a raised, plastic texture.
If you are using water-based acrylic ink, you will need to mix this with a textile medium to make the paint permanent when heat setting with an iron. You can, however, buy some ready-mixed fabric paints. The advantage of these is you don’t need to spend a lot of money to get started, but you may find color choices are more limited.
5
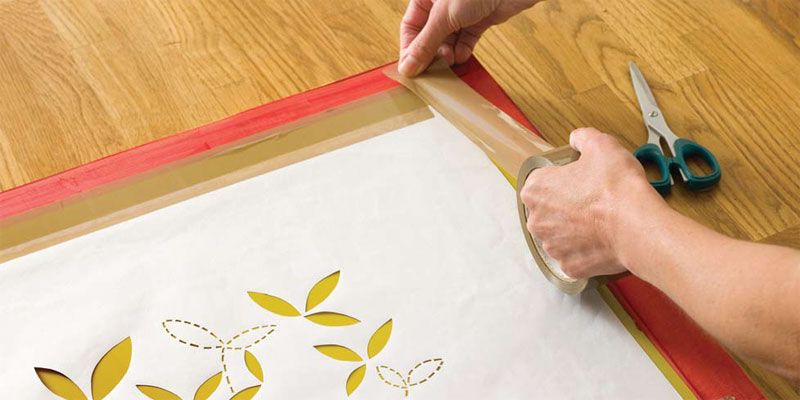
Parcel Tape: You will need to tape around the inside of the frame with parcel tape to prevent paint from leaking through where the mesh meets the frame. Once this has been done, you can keep the same tape on your screen until it needs to be replaced.
6
Spatulas: At the end of your printing session you will want to scoop up any remaining ink back into the pot for next time; the ink hasn’t got dirty and is perfectly suitable to use again. You just need to have a plastic spatula or scraper to hand to scoop up any excess ink.
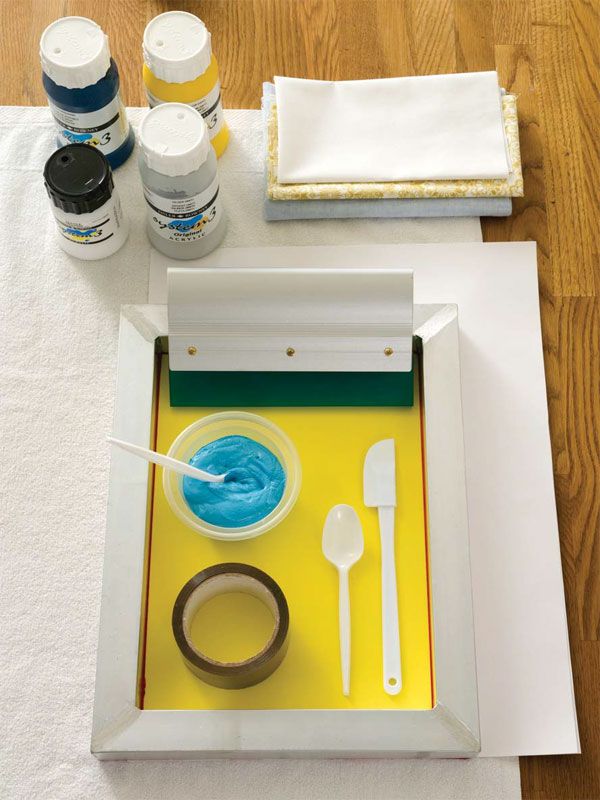
7
Towels: Printing on fabric can be tricky, with the fabric being prone to sliding on your work surface. To prevent this from happening, lay an old towel or blanket down and sit your screen on top. You will find this is all the extra friction you need to keep everything in place.
Karen Lewis shares her enthusiasm and love for hand printed fabric as well as insightful tutorials about fabric printing at home. If you want to learn about other materials for fabric printing that you might need or want to explore surface design further, be sure to order your copy of Screen Printing at Home by Karen Lewis today!
Enjoying this article? Sign up for our newsletter!
*This article contains affiliate links that helps us earn a small commission from purchases — at no additional cost to you. We are grateful for your support!


Join the Conversation!