Anatomy of Machine Quilted Feathers & Troubleshooting Tips – Quilting Daily
Feathers are one of the most popular free motion quilting motifs around. Learning how to machine quilt this design takes patience and practice; expert advice can also be very helpful.
Get started on your journey to mastering machine quilted feathers with insights from quilt instructor and fiber artist Ana Buzzalino. She wrote an entire series of articles for Quilting Arts Magazine focused on how to machine quilt feathers. Here is an excerpt from one of her articles describing the framework of a feather along with tips to navigate common setbacks you may encounter while quilting them.
Anatomy of a feather
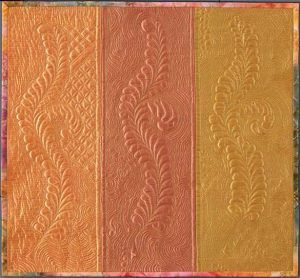
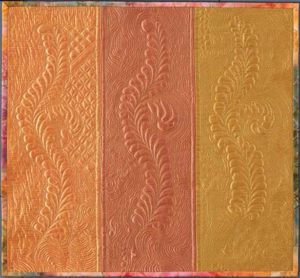
All quilted feathers have the same anatomy, regardless of whether they are marked or unmarked, traditional or organic. Feathers start at the root, or bottom, and the other end is the rounded portion, or tip.
 Feathers grow out from a line called a spine or stem. Spines can be single, double, or have areas to be filled with a secondary design. Spines on feathers are usually gentle curves, although straight spines or sharp curves are also seen. Spines sometimes branch out to make different designs or to fill a specific space.
Take a birds feather and run it through your fingertips; from root to tip it goes smooth but go the other way and the feathers separate and look messy. Quilting feathers works the same way: Quilt them from the root to the tip, double back, and quilt the other sideonce again, from the root to the tip.
Note: While most quilters quilt feathers from root to tip and back again to quilt the other side, there are some who quilt from tip to root with beautiful results. There are no absolutes, so try both ways and see which works best for you.
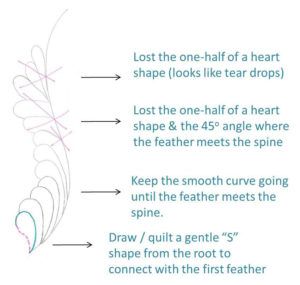
Individual feathers (the rounded loops attaching to the stem) look like one-half of a heart, and they are always drawn and stitched in the same manner: from the curve to the stem.
 Troubleshooting
I find that most people have trouble drawing the feathers because they lose the shape and they go from a one-half heart to a candy cane or a tear drop. Remember to keep the shape and the 45 angle constant.
Slow down the speed at which you quilt. Feathers are exact and you need to be in control, so take your time.
Practice drawing feathers on paper first until you feel confident and like the results you are getting. This is key. When you start to quilt feathers, your brain will know what you are doing and where to go next.
Remember, feathers do take practice. A LOT of practice. AB
Once youve got some experience under your belt, this dynamic design is bound to be the feather in your cap of quilting motifs.
Anas experience and advice is sure to help you on your path to mastering quilted feathers. Learn more about how to machine quilt feathers when you read her articles in their entirety when you order your copy of the Quilting Arts Magazine 2016 Collection CD. Get all six magazines as they were published on a convenient CD or download the digital collection for instant inspiration.
Happy quilting!


Join the Conversation!