Tips for Beginner Longarm Quilters: Everyone Can Longarm!
Are you a quilting enthusiast who’s ready to take your craft to the next level? If you’ve ever marveled at the intricate designs and beautifully stitched quilts created with longarm quilting machines, it’s time to dive into the world of longarm quilting yourself! Don’t be intimidated by the size and complexity of these machines – longarm quilting is an art form that is accessible to everyone, including first-timers. Just take a look at these tips for beginner longarm quilters from Carrie Sisk!
Journey along with Carrie as she outlines her ups and downs while tackling a longarm project for her soon-to-be-born daughter. The moral of the story? Practice makes perfect and don’t be afraid to make mistakes — it’s the best way to learn!
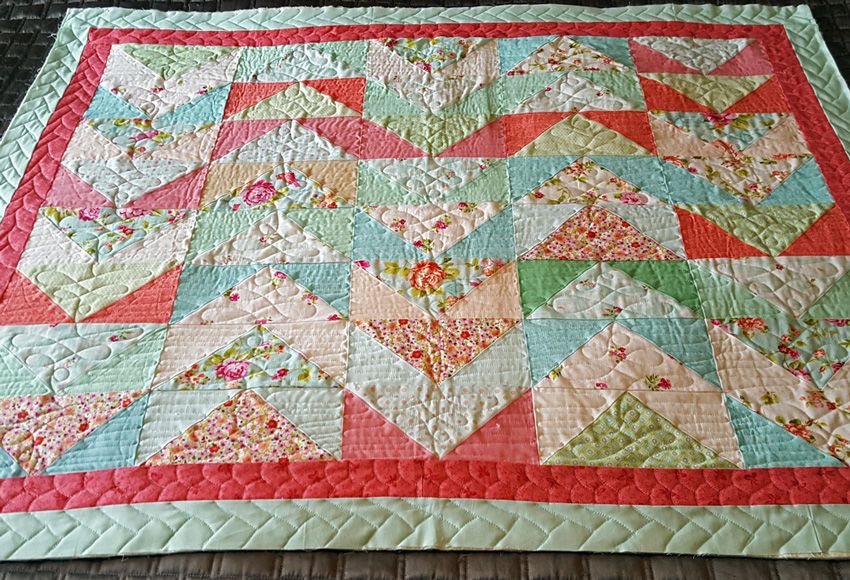
When I started putting the Snowbirds quilt, designed by Wendy Sheppard, together for my soon-to-be-born daughter, I never dreamt it would take me three years to finish. Talk about a UFO (unfinished object). I suppose that’s not a really long time for some people, but I’m not one to let projects marinate, so for me, this was far overdue. A couple more things I didn’t foresee when I set out to make this quilt:
1
Turning this quilt (meant to finish at 40″ x 49″) into a toddler-worthy quilt (I added an extra border). And…
2
Quilting it on a longarm quilting machine
Once I finished piecing the quilt top (whew!), our office had already received a Q’nique 14+ Quilter. I was excited to try it but hesitant to possibly ruin my now eldest daughter’s quilt with shoddy quilting by yours truly. But, after taking it for a test drive, I was hooked. I had to quilt it on this glorious machine.
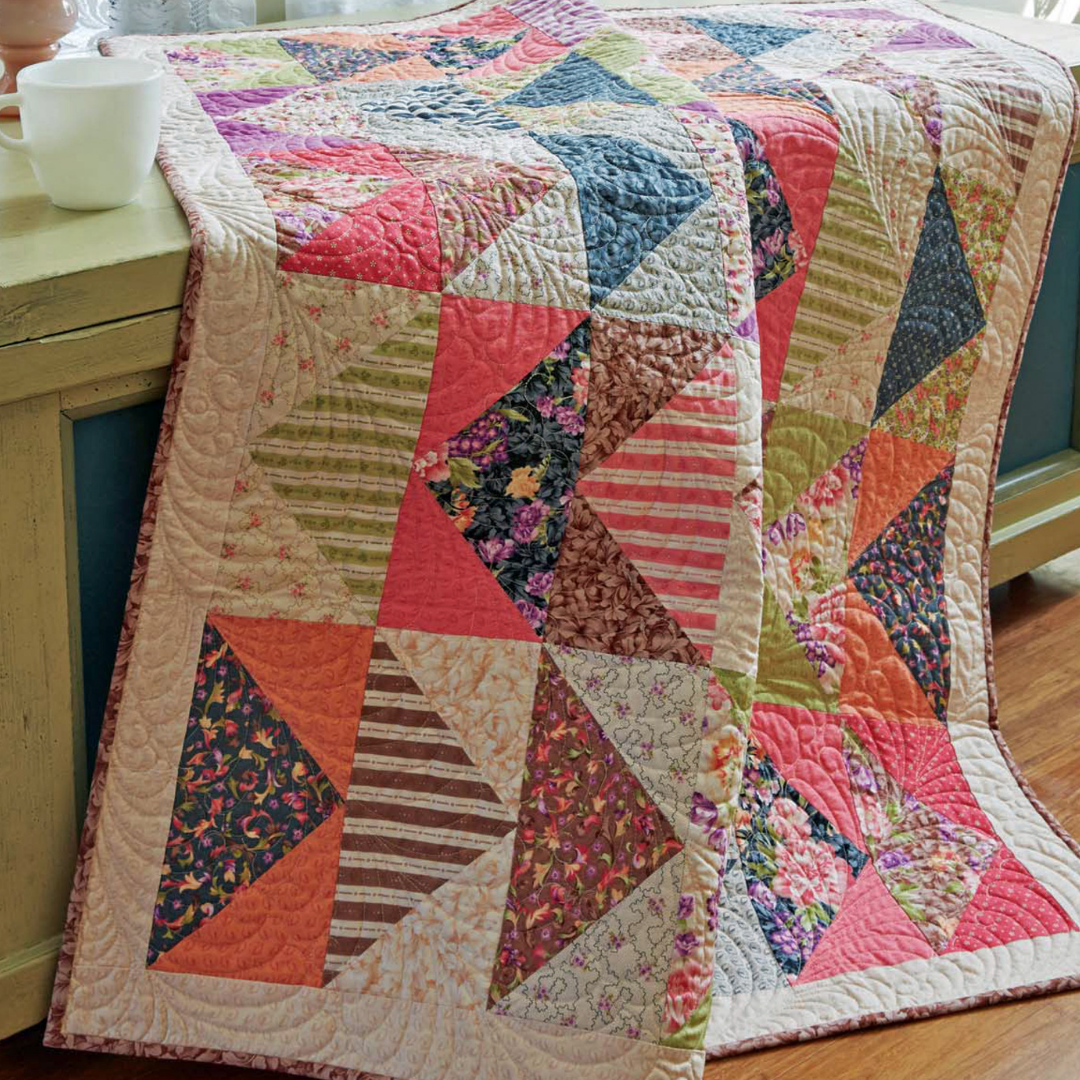
And, quilt it, I did! I thought I’d share some beginner tips with you since I learned a lot on my adventure. Nothing beats the actual experience, of course (you can rent time on a longarm quilting machine—check with your local dealers and quilt shops!), but it doesn’t hurt to go in armed with a little friendly advice.
Tip #1: Plan Your Design or Motifs Before Jumping In
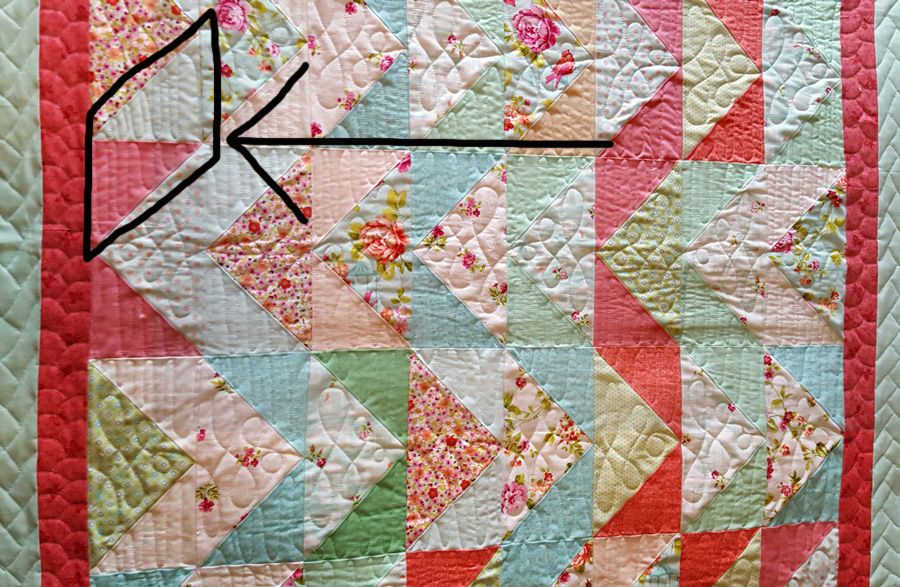
Just as you would when preparing to design your quilt tops, I recommend laying your finished quilt top out and studying it. You can search for quilting designs and motifs via web browser, on Pinterest, in books like 501 Quilting Motifs… anywhere! I didn’t refer to my quilt top in its entirety before quilting it, just contemplated each row as a stand-alone quilting project, and later realized I would have quilted the smaller triangles across each row as one unit instead of separate units. Live and learn.
Tip #2: Practice Your Designs on Paper First
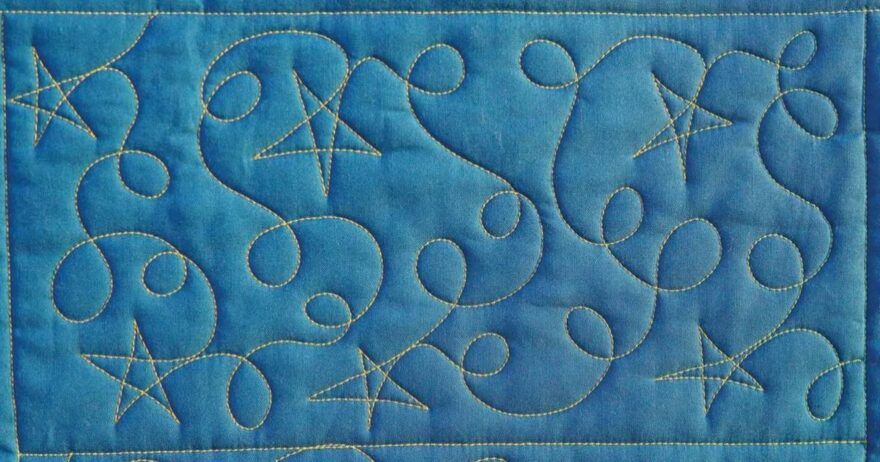
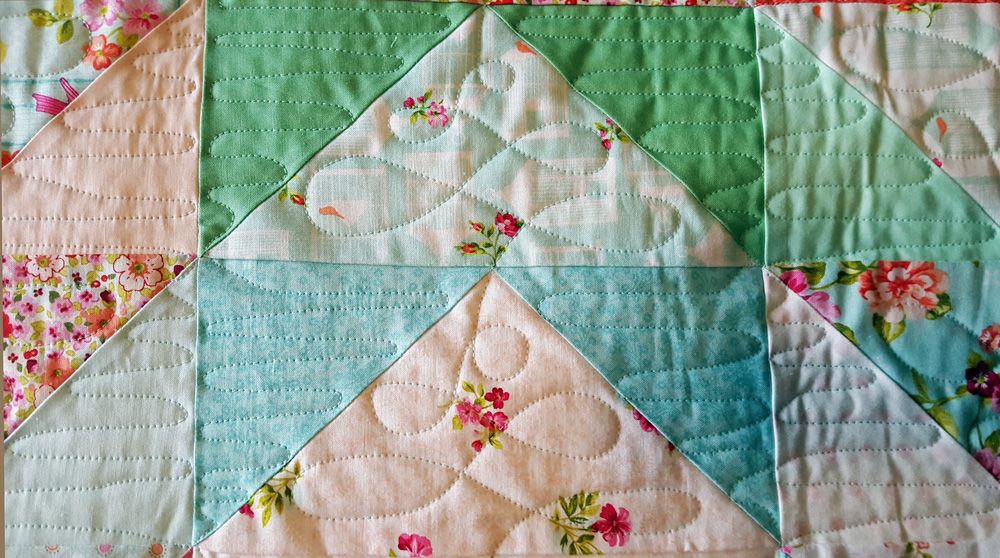
Before you put needle to fabric, try putting pen (or marker) to paper. Draw as you would quilt. Meaning, position your paper how you will be framing your quilt. If it’s loaded on the quilt frame horizontally, draw your design as if you’re quilting across your quilt, side-to-side. This way, you get a feel for how you’ll be moving through your quilting. Loop-de-loops are a whole different animal when drawing them side-to-side rather than up and down. You’ll also notice the mistakes you’re inclined to make. My loops? They don’t always go in the same direction—I decided to practice those a bit more.
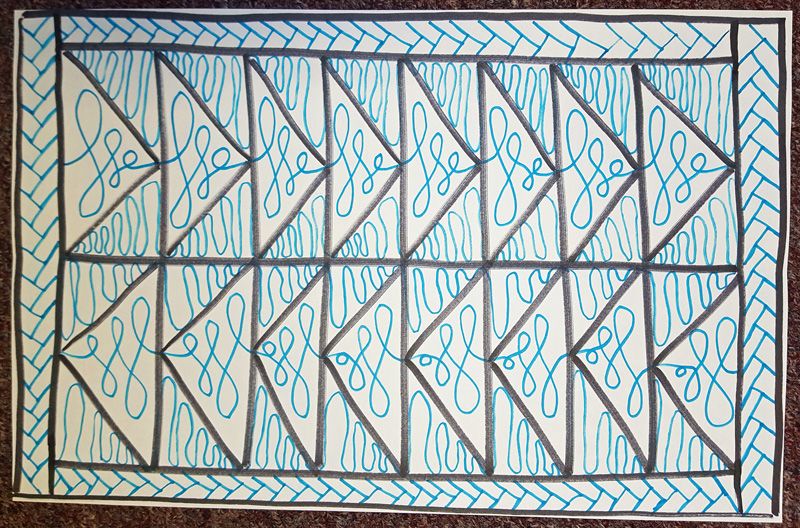
Drawing out your designs beforehand builds muscle memory—your brain becomes accustomed to that specific motor task through repetition. You’ll notice that it’s as if your muscles “remember” your designs once you start quilting. And, finally, practicing answers the following questions: 1) How will I continuously quilt so as not to break thread? 2) In what order and direction will I quilt my motifs? 3) Do I like how my motifs work together?
Tip #3: Heed the Extra 8″ Rule
I thought I could get away with 6″ because… I’m unique? There’s a reason expert quilters recommend certain things. And, there’s a reason they’re the experts. So, when ZJ Humbach tells you to allow an extra 4″ on each side of your quilt backing and batting, you listen. It’s amazing how much your quilt backing and batting will start to disappear as you quilt. I got lucky and had just enough that everything worked out, but I don’t recommend living on the edge when it comes to finishing your quilts.
Tip #4: Start with Free-Motion Quilting
Pantographs and rulers are fun, but they take a bit more know-how than free-motion. My first experience with a longarm was amazing—I got to watch the lovely and talented Dawn Cavanaugh film the APQS Longarm Certification online workshop and afterward, take her machine for a quick spin. BUT, it was also daunting because it involved using a laser guide… from behind the machine… following a pantograph design. That was enough to turn me off of longarm quilting (I recklessly admitted defeat—bad quilter!) until I finally recovered enough to discover that free-motion quilting was heads-and-tails easier. Now, I’m hooked!
Tip #5: Try Curves First
I know, I know… quilters often refer to “curves” as if it’s a dirty word. Well, not in free-motion longarm quilting. I decided to quilt a straight braid around the outer border and quickly realized that retracing my stitches is easier said than done. When I revisit straight lines in my longarming, I just might be using a ruler (tip: longarm quilting rulers are specifically made for quilting on a longarm machine—they’re thicker and accommodate a hopping foot).
Tip #6: Solid Fabrics Showcase Your Quilting
If you’re not sure you want your quilting to be front and center, consider working with prints or batiks for your first round of longarm quilting. You’d think this would be common quilting sense, but this thought didn’t even cross my mind before I began. It was a bit of shock when I whoopsied across my solid piecing. Like I said, front and center.
Tip #7: Reframing Your Quilt Mid-Quilting is Not the Best Idea
Yes, I did this. I wanted to approach my borders from the side, so once I had the side borders and Flying Geese units quilted, I took the quilt off the frame, turned it 90°, and quilted the remaining borders. Finding the center of your quilt top after it’s been quilted is challenging. I had excess quilt backing and batting to contend with, so finding the center was more of a ready, fire, aim approach. When the name of the game is keeping things square, this might not be the way to go.
Tip #8: Don’t Be Afraid to Make Mistakes!
I want everything to be perfect before I even know what I’m doing—it’s one of my things. I’m trying to be more lenient with myself, but it doesn’t always take. Case in point, I ended up ripping out an entire row of stitches—I decided to change my design for the remaining rows and I knew I wouldn’t be able to see past the initial design. For my own sanity, it had to be done. Stay calm and grab the seam ripper. A word of caution, however: ripping quilting is a bit more labor-intensive than ripping seams. It takes a while.
Tip #9: Relax Your Body. Your Muscles (+ Quilt) Will Thank You
I channeled the great longarm quilter, Angela Huffman (she offers excellent online classes, including Longarm Fundamentals) while I was quilting, recalling her advice to relax the body when longarm quilting. It is incredibly easy to tense up when you’re super focused and attempting to stay on track. But, tense quilting is hard on every part of your body and you’ll pay for it later. It also means that you probably won’t be longarm quilting very often because your body can’t withstand the aches and pains. Plus, your quilting pays the price. If you’re relaxed and calm (drawing out your designs prior to quilting helps here, too—it builds confidence), it will be reflected in your designs. If you could use a little help loosening up, we have great Quilting Ergonomics and No More Backaches webinars with Michael Engman (certified personal trainer and orthopedic exercise specialist). And, the best piece of advice I can give…
As you can see, longarm quilting opens up a world of possibilities for quilters of all skill levels. With the right knowledge and a little practice, you can create stunning and intricate quilts that will be cherished for generations. And always remember that mistakes happen to all quilters — even the pros! Don’t be afraid to start small and work your way up. With each stitch, you’ll gain more confidence and refine your skills.
Have tons of fun!
It’s just the beginning…
Carrie
Enjoying this article? Sign up for our newsletter!
*This article contains affiliate links that helps us earn a small commission from purchases (at no additional cost to you). We are grateful for your support!


Join the Conversation!