I Love This Quilt! Kinabalu

Do you love this quilt, too? Jinny Beyers design uses value, color and print in such an interesting way to make a unique quilt full of movement. I was curious to see how I could interpret this pattern in my own way, using the technical guidelines as written, but ending up with a quilt that looks totally different. Let’s see how I did! But first, here’s a reminder of what the original Kinabalu quilt looks like, which is available for download as a free quilt pattern.
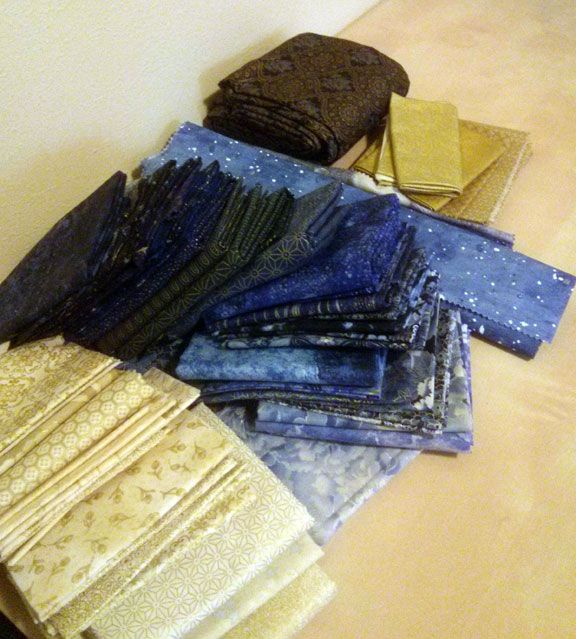
I started with fabric selection first, of course, deciding upon cream and tan prints for the lights and various shades of blue for the darks. The fun thing about making this quilt was deciding to use lots of prints with metallic accents. Many quilters (or at least many in this office) don’t care for the metallic prints very much, but I love the warmth and sparkle they have so I thought it would be fun to throw as many as possible in the mix. I briefly considered reversing the values for the block for a way different look, but I had way more light fabric than dark fabric, so that decided that for me and I went with a similar value placement to the original quilt. I pulled all the fabrics from my stash and got started cutting.
Fabric selection. Ive got creams, ivories, tans, golds and all shades of blue dusted with sparkly silver and gold. That dark fabric at the top is going to be a wide border.
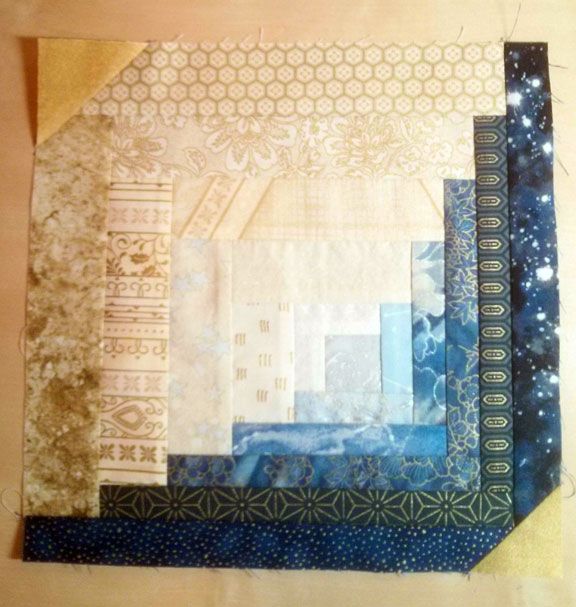
I cut strips for the blocks exactly as written in the pattern, just substituting my scrappy fabrics for the planned prints in the pattern. The first major change I made to the blocks was to use a pale silver print for the center square (technically that square is not in the center but you know what I mean) instead of the contrasting dark square that Jinny used. This gives the block a more subtle effect since the silver acts as a step in the gradient from cream to light blue.
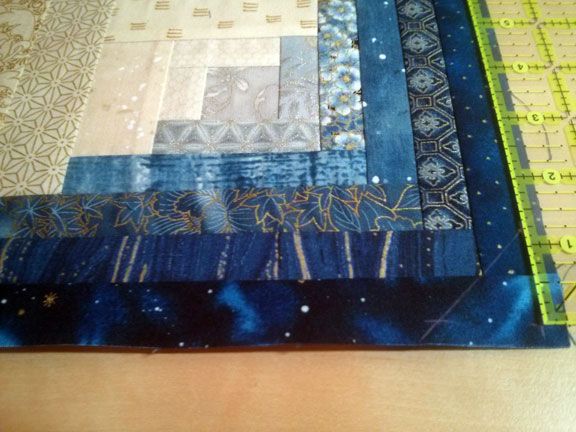
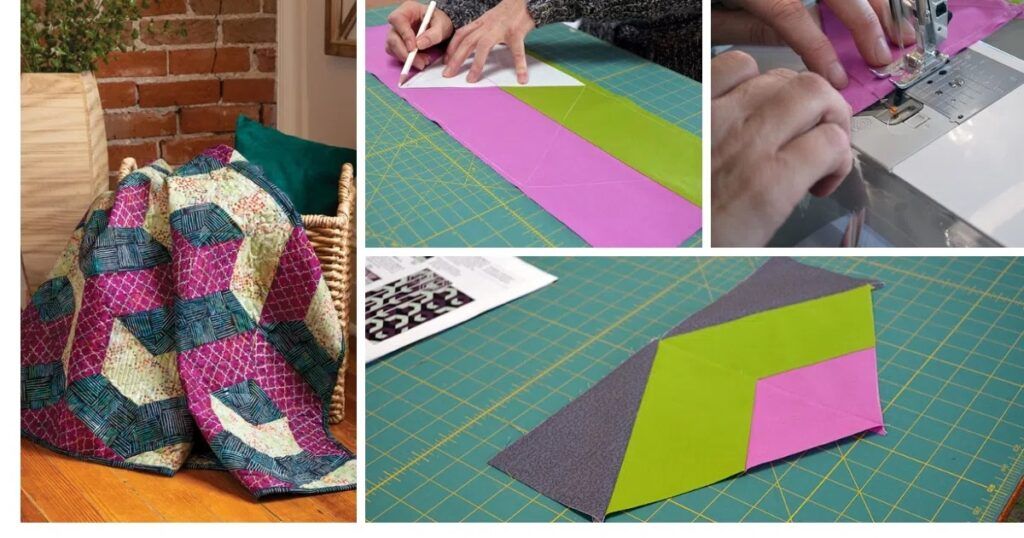
You’ll also notice in the original quilt that Jinny added a sage-colored triangle to one corner of her block. Its hard to tell from the quilt photo above, but this triangle is fussy cut from a border print. I didn’t want to do that, but I was happy to do a simpler stitch-and-flip triangle on the corners. It would be a perfect place for a cool solid gold textured fabric that I just love. I drew a line intersecting the dark corner seam, then measured along the seam allowance to figure out what size to cut the squares for stitch-and-flip.
Scrappy log cabin variation block. I figured out what size to cut squares for stitch-and-flip, rather than fussy cutting triangles for the block corners.
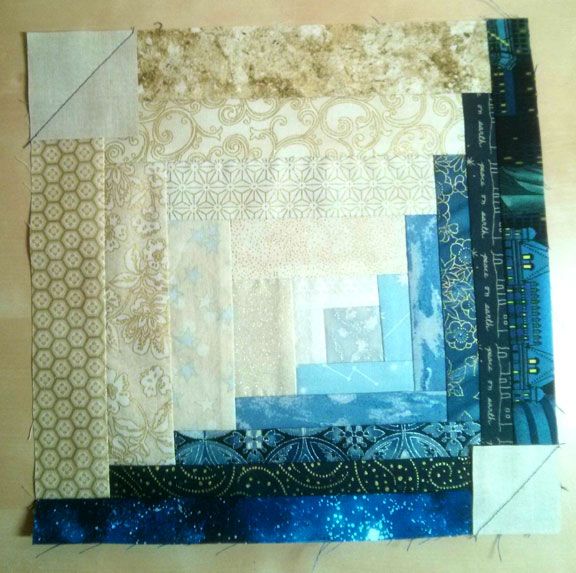
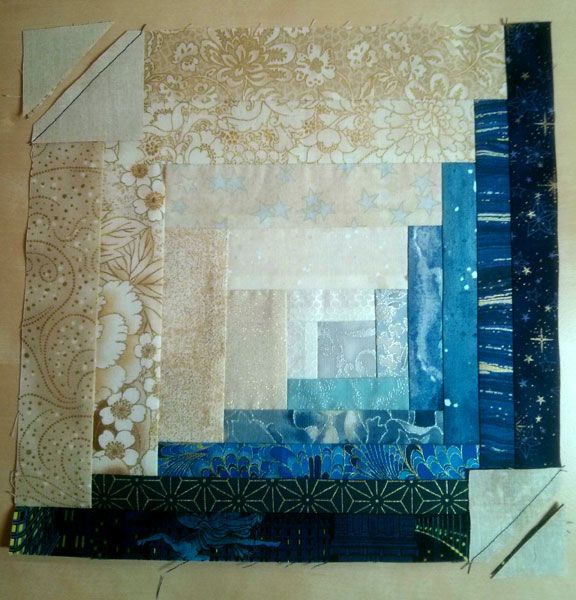
You can see in the photo above that the corner square should finish at 1 1/4″, so I cut the corner squares for stitch-and-flip at 1 3/4″. I had enough fabric to do another stitch-and-flip on the light block corner, so I cut those squares just a bit larger at 2 1/4″. I’ll show photos of the whole stitch-and-flip process—not because you don’t know how to do it, but because it’s an opportunity for me to show the variety of scrappy blocks. They’re similar to one another but also completely different.
After the marked squares are stitched to the corners, the seam allowance is trimmed to 1/4″.
Then the triangles are pressed! What a great technique. So easy, so fun and it looks really cool as you can see below!
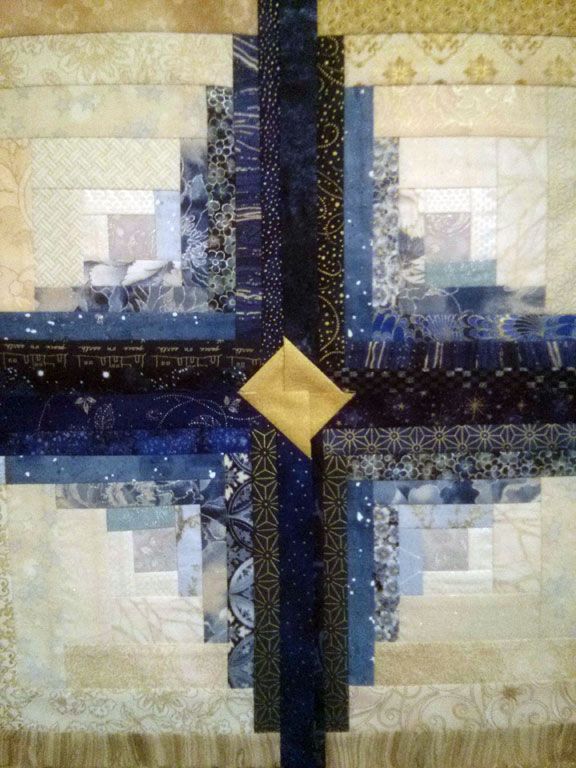
So once I got done with all the blocks, I got to arrange them on my design wall. I started the center of my quilt the same way that Jinny did.
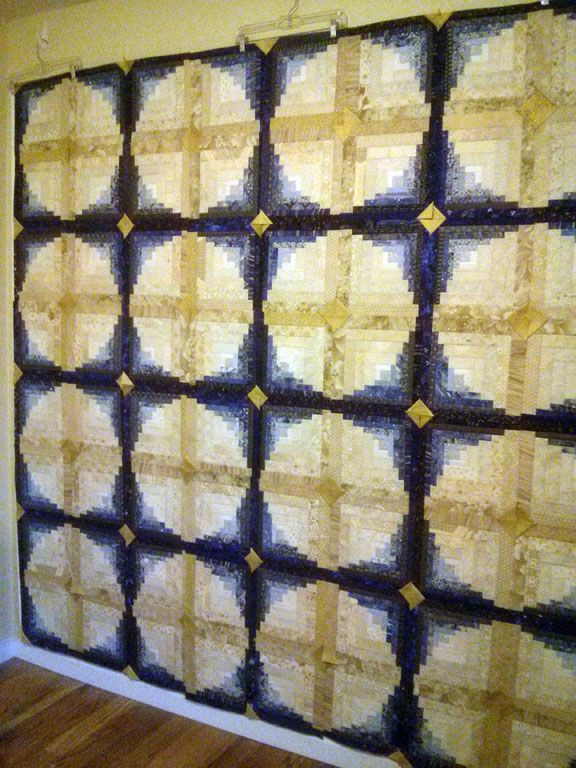
But then! I arranged the rest of my blocks differently. It has a calm, almost serene look to it, very different from the original energetic design. I just have to sew the blocks and rows together and the quilt center will be done.
Its a completely different quilt! I do plan to do a border or two, so after I sew to center together I can come back and show you what I plan to do next. I still love the original quilt, but this version is pretty lovable too, I think!
We get a lot of requests for scrappy quilt patterns. In making this quilt I was reminded how pretty much every quilt pattern can be made scrappy by creative interpretation of the patterns fabric requirements. There is no reason that specific red floral print can’t become lots of assorted red prints, floral or otherwise, if that’s what you want to do. When I make patterns from other designers, I like to challenge myself to switch up the pattern in several ways so even though I’m making a quilt from someone else’s pattern, I still end up with an original, one-of-a-kind quilt. I’d encourage anyone to try the same approach, it can be so fun.
When selecting fabrics for scrappy quilts, the main thing to look at is value, instead of color or print. This sounds backwards, but its true! I had to think a lot about value for this quilt since there are five rounds of strips for each color, so I divided each color family of my fabrics into 5 groups, separated by value. But within each value of the blues, for example, I used greenish hues, grayish hues, purplish hues, and even black in the darker groups. Since they’re close in value, it works. But if you’re indiscriminate about value, then the final composition can lack cohesiveness since the eye keeps moving from light to dark areas. For the same reason its a good idea to keep the scale of prints similar, though I like to throw in a few larger scale prints here and there for fun.
One recommendation I have, specific to this pattern, is to chain piece everything! Cut out all patches beforehand, and sew all the blocks assembly style, without cutting thread in between blocks. For many quilters this might be second nature, but if its not your habit to work this way, try it for this pattern. Its so much more efficient and this block, while easy, is pretty labor-intensive so it will make construction much more efficient. Ive been chain piecing on evenings and weekends like a maniac for the past month and I just finished the blocks yesterday. This is not a quick finish, so every little bit of efficiency helps.
I hope you love this quilt as much as I do, and that you’ll try a version of your own!
UPDATE: I’ve finished the quilt! You can read about that here.


Join the Conversation!