Making Your Own Pieced Quilt Backing Fabric: It’s Just the Back
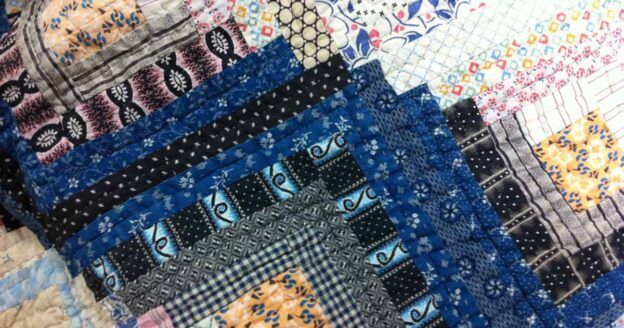
I remember the quilts my grandmother made. They were always scrap quilts; she wouldn’t have dreamed of buying fabric to make a quilt. She used leftovers from garment sewing and the “good” pieces of fabric from worn-out clothing. Because she was a thrifty woman, she always pieced her quilt backs, making them out of 10˝–12˝ squares of fabric, sewn together in rows.
By the time I started quilting in the mid-1990s, quilts were made from 100-percent quilting cotton, coordinating fabrics bought specifically for making a quilt. The backs were made with a big long piece of one fabric seamed together. For a while, I did that without thinking a whole lot about it. But as I continued making quilts, I had more and more fabric leftover and I started thinking about my grandmother’s pieced quilt backs. I decided it was time to give pieced backs a try.
How It All Began
My motivation when I made those first pieced backs was simply to save money and to gain some control over the amount of fabric I was accumulating. Why should I buy fabric for a quilt back when I had so much in my stash?

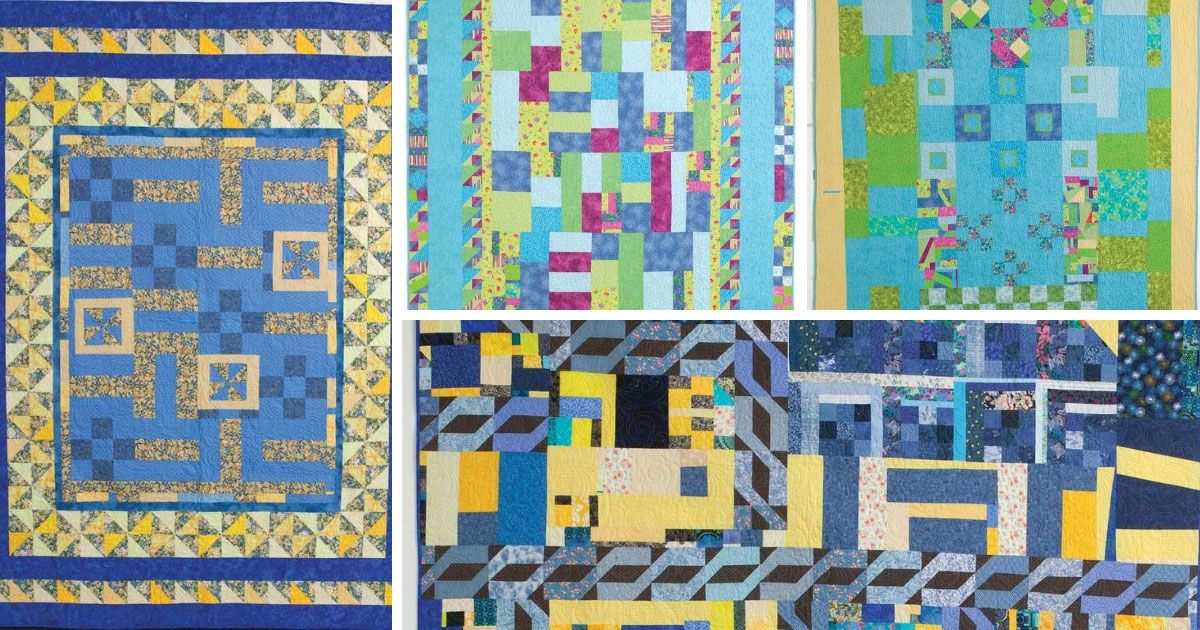
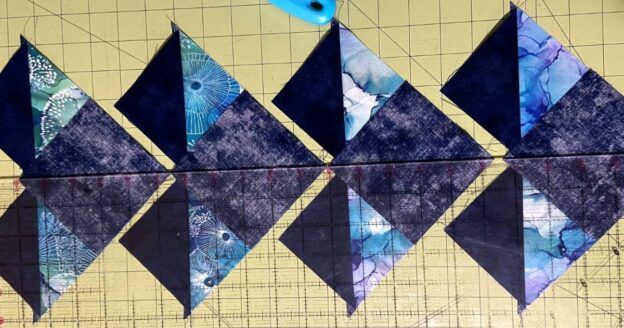
My first pieced quilt backs were simple squares sewn together in rows just like my grandmother had done. But before long something happened. My creativity kicked in and I started experimenting. My pieced backs became more complicated. I used different sizes of squares or rectangles together on the back of one quilt. I bought just one length of quilt backing fabric (if the quilt was 90˝ x 90˝, I’d buy 98˝ of 40˝ to 42˝-wide fabric) and see what I could incorporate to make that one length of fabric be enough for the entire back.

Crazy About Crazy Quilting
I added coordinating fabrics; I started using leftover blocks, orphan blocks, blocks that weren’t quite the right size and even blocks that weren’t well made. Rather than take a poorly sewn block apart, I said, “The points don’t match, I’ll just put it on the back where it doesn’t matter.” I added pieces of vintage hand embroidery and samples of machine embroidery. If I had a piece of fabric that didn’t quite go with the rest of the fabrics, I cut it in pieces and put it in a number of places on the back.

For me, making the back became as much fun as making the front. I didn’t think of myself as an improvisational quilter or an art quilter when I began but that’s exactly what was happening as I made more and more pieced backs for quilts. My design wall is a critical part of making a pieced back.
More Tips & Tricks
I like to use the leftover fabrics from the front of the quilt, then add fabrics and blocks from my stash, trying to stay with the general color scheme of the front of the quilt. I audition possible fabrics and blocks as I sew, moving the bits and pieces according to what I find pleasing to my eye. I have no formal art training so this is just what looks good to me.

I like asymmetry and odd numbers of blocks and parts. This is improv piecing at its best. I sew and cut and move things to a better spot if needed. Then I sew, cut and rearrange again. There is no right or wrong. Again, it’s just the back. Are you ready to try? Start at whatever level is comfortable to you and make a pieced back.
Perhaps you’ll want to start with a handful of fat quarters and sew them together in rows for your first attempt. Then you can challenge yourself to try something new on the next one. If it doesn’t work out quite like you had in mind, you can use it anyway; after all, it’s just the back. But I’ll warn you: sometimes the back is so wonderful it’s hard to decide which is the back and which is the front.
Lori’s 4 Simple Rules for Making Your Own Pieced Quilt Backing Fabric:
✓
The completed pieced back must lay flat, with no lumps or bumps.
✓
The seams need to be at least 1/4˝ wide for durability.
✓
The fabrics used for the back of the quilt should need the same care as the fabrics on the front. For example, if the front will be machine washable and dryable, the back should be also.
✓
Seams and points don’t have to match.
Go Get Crazy!
What do you think about making your own pieced quilt backing fabric now? Do you think you’ll give it a try? If you do, be sure to share your thoughts and your final results with us on Instagram, Facebook, or the comments below! Check out the April/May 2016 issue of Quilters Newsletter for more.
Enjoying this article? Sign up for our newsletter!


I am trying to renew subscription to Quilting Aets magazine -Imade an unsuccessful attempt yesterday.
Hi Len,
Have you reached out to the customer service team yet to have them look into it? If not, here are all the ways you can get in touch: https://www.quiltingcompany.com/contact-us/.
Best,
Brenna
The Quilting Company Team