Nancy’s Quilting Classroom: Mitered Quilt Borders

Our best-selling online course is back and better than ever! APQS Longarm Certification Sponsored by Quilting Daily has been revised and updated. Not only will you learn how to make beautiful quilts, you’ll also gain skills to turn your passion into a paycheck with tips on how to run your own quilting business.

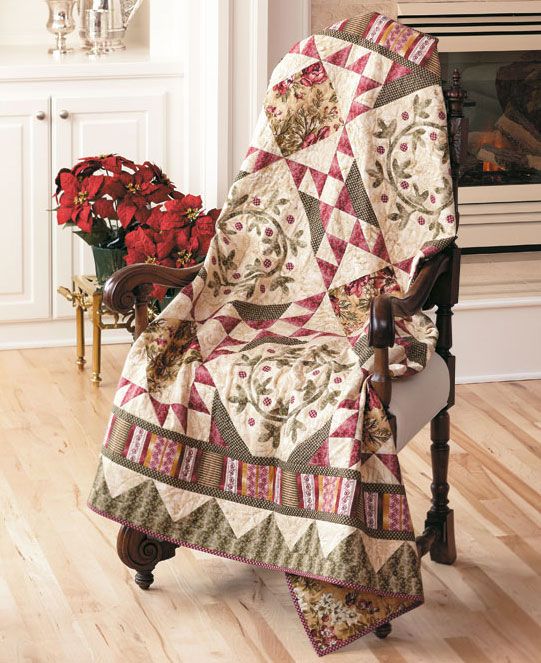
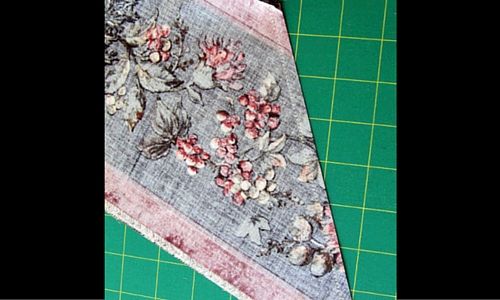
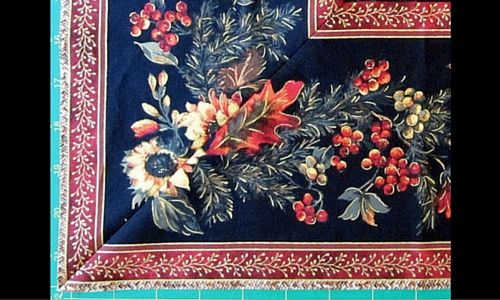
Do you love the look of mitered quilt borders, but find them a bit daunting? Some quilters add mitered quilt borders to all of their quilts. On the other hand, I only add them when I’m using a gorgeous border stripe like the one in Berry Wreath from the Love of Quilting Nov/Dec 2011 issue. Then mitered borders are the perfect choice and nicely frame a quilt.

There are several ways to sew the corners on mitered borders. However, I’ve found the following method gives me the best results:

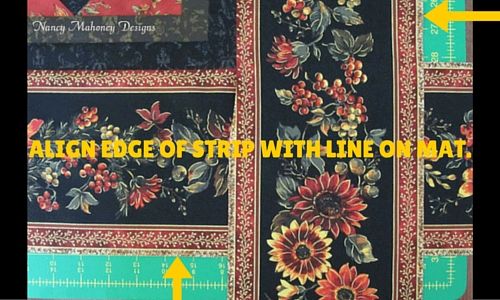
  1. Start by estimating the finished dimensions of the quilt top, including the mitered border. Add 3″ to 4″ to this measurement and cut the border strips to that length.
  2. Use a pin to mark the center of the quilt top edges and border strips.
  3. Measure the quilt top through the center to determine its width and length.
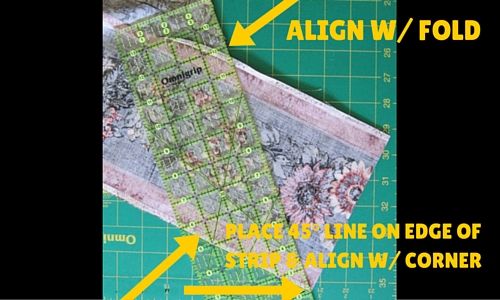
  4. On each end of the side border strips, place a pin equidistant from the center pin to mark the length of the quilt top. On the top and bottom borders, mark the width of the quilt top with a pin in the same way.
  5. Pin the side borders to the quilt top, matching the centers and aligning the pins at both ends of the border strip with the quilt top edges.
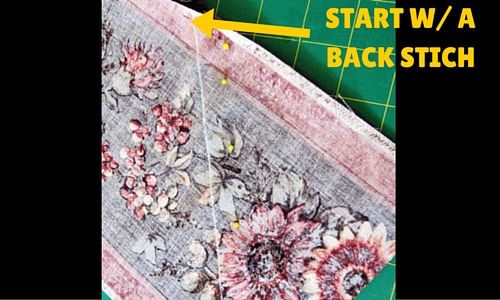
  6. Starting ¼” from the raw edges of the quilt top, sew the border strip to the quilt top, beginning and ending with a backstitch. Add the top and bottom borders in the same way.
  7. Press the seam allowances toward the borders.

Now comes the tricky part – mitering the corners!

1. Lay one corner of the quilt top, right side up, on a cutting mat. Align the edge of one strip with a line on the mat. Overlapping the loose ends of the strips, align the edge of the adjacent strip with a line on the cutting mat.
Mitered Quilt Borders 1
2. Place a square ruler on top of the overlapped strips. Align the edge of the ruler with the raw edges of the strips and the 45° line with the outside corner.
Mitered Quilt Borders 2
3. Using a rotary cutter, cut along the edge of the ruler to trim the ends of both border strips.
Mitered Quilt Borders 3
4. Aligning the raw edges, place the border strips right sides together, forming a diagonal fold in the quilt top. Align the 45° line on a ruler with the outer edge of the top strip. Place the ruler’s edge along the fold, making sure the ruler is aligned with the outer corner.
Mitered Quilt Borders 4
5. Use a pencil or chalk to draw a line along the edge of the ruler. Pin the borders together, making sure to match any seamlines (or lines in the fabric strip).
Mitered Quilt Borders 5
6. Sew on the drawn line, beginning at the inside corner with a backstitch. Remove the pins as you go and end with a backstitch. Unfold the quilt top; the corner should be square and lay flat. Any seamlines or lines in the fabric should match. If everything looks good, refold the quilt top, right sides together, and trim the extra border fabric, leaving a ¼” wide seam allowance.
Mitered Quilt Borders 6
7. Press the seam allowances open to reduce bulk. Repeat the process to miter the remaining three corners.
Mitered Quilt Borders 7

If you’d like to see mitered quilt borders in action, take a look at this free quilting video tutorial – Sew Easy: Mitered Quilt Borders.

Now, sit back and enjoy your beautifully mitered corners. Chocolate for everyone!!

Nancy Mahoney, Fons & Porter Guest Blogger

Happy Quilting!

Nancy

Other topics you may enjoy:

Related Articles

Join the Conversation!