QM Bitty Baskets: You Have Options

#qmbittyblocks
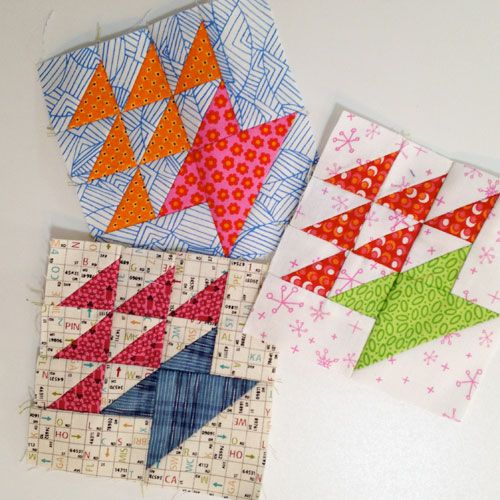
We’re having a lot of fun with Bitty Blocks around here, and last week I started making Bitty Baskets. Paula did a nice job on last week’s tutorial, and her enthusiasm is contagious.
A number of people have commented about the smallness of the half-square triangles (also called triangle-squares; the two terms mean exactly the same thing). I wanted to share some options with you, and perhaps you’ll find they make the triangles easier to handle.

Triangles on a Roll
For the first few baskets I made, I used triangle paper called Triangles on a Roll. In fact I use paper to make triangle-squares of any size, all the time. It’s the most accurate method for me. I also use and like Thangles, paper, shown below.

Thangles triangle papers come in many sizes.
But in case you don’t want to use paper, I have another little trick that I absolutely love. You can use this any time you need half-square triangles for quilts. First I’m going to explain how it’s done, and then I’ll explain the math for those who are interested.

Start with 2 squares.
Begin with 2 squares. For 1″ finished triangle-squares, cut them 3-3/4″ x 3-3/4″ (that’s 3.75″). Please note: These photos use larger squares but the process is exactly the same.

Mark one of the squares 1/4″ out from the diagonal center in both directions.
On its wrong side, mark one square 1/4″ out from the diagonal center in both directions. I do this with a Quarter-Inch Seam Marker, but you can use any quilting ruler that’s long enough to cover the diagonal.

The square is marked in both directions, 1/4″ out from each side of the diagonal center.
Place the squares right sides together.

Sew on all of the marked lines.
Sew on all of the marked lines.

Cut on the vertical and horizontal centers of the squares by lining up the ruler as shown.
Cut on the vertical and horizontal centers of the squares (in other words, cut down the middle, both ways) by lining up the ruler as shown. On 3-3/4″ squares (for 1″ finished triangle-squares), halfway across is 1-7/8″.

Make a second set of cuts between the lines of stitching as shown.
Make a second set of cuts between the lines of stitching as shown.

This method yields 8 half-square triangles.
You’ll get 8 half-square triangles using this method.

Eight pretty little triangle-squares
Open up each one and press gently so as not to stretch.

Trim off the little dog ears.
Trim off the tiny triangular “dog ears” and the triangle-squares are ready to use in your Bitty Blocks or any other project you choose.
How to Figure the Square Sizes: Understanding the Math
For those who are interested, it’s not difficult to determine what size to cut the squares for any half-square triangles you wish to make.

You may already know the rule of 7/8″, i.e. in order to make two half-square triangles from two squares, you take the finished size and add 7/8″. If you’re making two HSTs to finish at 4″ as shown above, you cut two squares 4-7/8″, put them right sides together and sew 1/4″ out from both sides of the diagonal center. Cut between the lines of stitching and you have two HSTs that are now 4-1/2″, to finish at 4″ square. This method is shown above.
You’re just grouping more squares together!
What you’re doing with the trick I showed in photos further above is putting 4 of these squares together, 2 across and 2 down. So you have the size of the finished unit, times 2. And you must add the 7/8″ twice , which is 1-3/4″ (1.75″).
So if you’re making 1″ finished triangle-squares for Bitty Blocks, the math goes like this:
1″ + 1″ + 1.75″ = 3.75″
If you’re making 2″ finished triangle-squares, the math would be this:
2″ + 2″ + 1.75 = 5.75″
If you’re making 4″ finished triangle-squares, the math would be this:
4″ + 4″ + 1.75″ + 9.75″
In other words, multiply the finished size by 2 and add 1.75″.
Here’s a little chart with often-used sizes.
Finished size of HST Size to cut the squares
1″ 3.75″
1.5″ 4.75″
2″ 5.75″
2.5″ 6.75″
3″ 7.75″
4″ 9.75″
Give it a try and see how it goes. I love this method for small patches especially, and I think you will, too. Send your questions and photos to [email protected], or ask questions in the comments. Happy Stitching!
*** Printer-friendly version coming soon ***


Join the Conversation!