Workshop Wednesday: Free-Motion Quilting Troubleshooting
Tourist: How do you get to Carnegie Hall?
New Yorker: Practice, practice, practice.
Practicing is hard.
No matter what skill you’re working on, practicing is often tedious and frustrating and just plain hard.
That is, until you learn how to practice. And then practicing will still be tedious and frustrating and hard, but it will also become interesting and compelling. That’s when practicing goes from something you have to do to something you want to do because you can see where it’s leading.
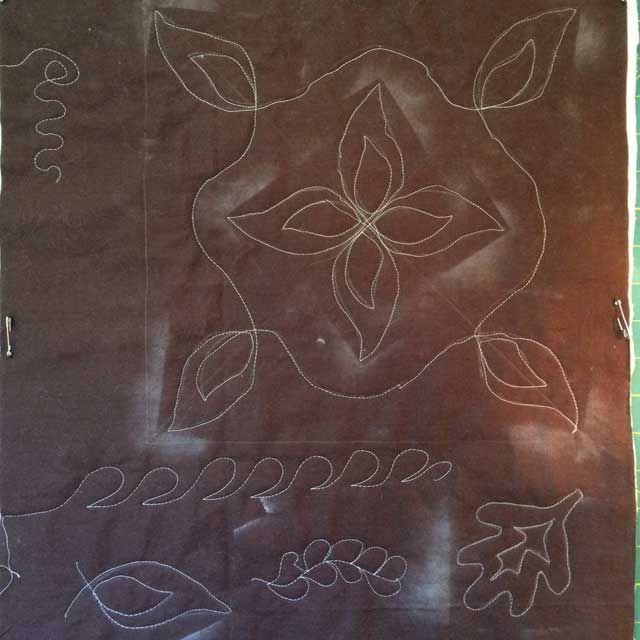
practicing motifs for free-motion quilting after lots of troubleshooting — it’s looking better there toward the bottom
I know this is true because I’ve been through it before, back when I was working on my music degree. I once saw the experience of being a music major summarized as, “If you don’t feel terrible about yourself all the time, you’re doing it wrong,” and it’s pretty accurate. I can’t tell you how many tears of frustration and disappointment I shed in practice rooms while I was in college.
But I also know that it took a few years of constant practice and of doing what my teacher told me to do before I had experienced enough moments of success, however fleeting, to know why I was practicing and how to approach it. I had to learn how to troubleshoot my own voice.
Trust me, this relates to quilting.
Over the past couple of months in our regular Design Wall Tuesday blog posts I’ve been sharing what I call “my free-motion quilting saga.”
I’ve attempted free-motion quilting on a domestic machine before but never committed to trying to become really proficient because I always heard that it required a lot of practice. I figured I would rather spend my time actually making something than practicing to make something, so I’ve avoided putting in the work.

Quilt top awaiting free-motion quilting
But then I made a quilt top that I feel deserves more than just straight-line quilting done with a walking foot (and because I want to actually finish it someday, I decided against trying to hand quilt it).
This time, I’m motivated.
So here I am, almost two months into seriously trying to figure out this whole FMQ thing using a high-quality, new-to-me machine that’s about eight or nine years old. I was only running into tension and thread breakage problems when trying free-motion, and I know that many people successfully quilt with many different types of machines, so there had to be a way to make it work.
The good news, as I shared in yesterday’s Design Wall Tuesday blog post, is that I think I’m done with the troubleshooting part. Here is what I’ve learned.
Tension
The first thing I did when I encountered problems was to monkey around with the thread tension dial. Neither increasing nor decreasing the tension solved my problems and in fact only created new ones, so it’s back to a mid-range setting appropriate for piecing and there it shall stay.
Automatic settings
A colleague who knows a lot about this machine manufacturer in particular recommended that I deselect any automatic settings that might be impacting the tension. The user’s manual doesn’t say anything about how default settings might affect FMQ, but I always turn them off now, and it seems to have helped.
Stitch length
A lot of people say that as long as your feed dogs are down and you’re in the correct FMQ setting for your machine, you shouldn’t have to adjust your stitch length. And then you have someone like Leah Day who leaves her feed dogs up and reduces her stitch length to zero. Again looking to reduce any areas where my machine might want to think for me, I now set my stitch length to zero and lower my feed dogs.
the back of a test quilt sandwich showing a few places where the thread broke
Speed
As I’ve always heard, the big challenge with free-motion quilting is finding the sweet spot between the speed with which you move the quilt sandwich and the machine’s speed. However, I didn’t realize until recently that my new-to-me machine has three different speed settings, meaning I don’t have to control the machine solely with the foot pedal.
Setting the machine to the slowest speed immediately made a huge difference in the quality and consistency of my stitches. Basically, it gives me time for my brain to catch up to my hands and to think about what I’m doing; it also allows me to stop and start in the middle of a motif more smoothly. It’s made me realize that machine quilting doesn’t have to be the equivalent of a long, uninterrupted, highly choreographed camera take like you’d see in “Touch of Evil” or “Goodfellas”*. I can yell “Cut!” and reset for the next shot, or rather, I can pause in the middle of a motif and figure out where I want to go next. I’m not really exaggerating when I say this has been revelatory.
Maybe someday I’ll set my machine to a higher speed, but for now I’m totally happy not to be sewing pedal-to-the-metal. For me, slow and steady will win the race.
*Why yes, I once worked in a video store. Why do you ask?
Presser foot up/down
Even with all those tweaks, I was still frequently having problems with the thread breaking after stitching for only an inch or two. It was highly frustrating and required me to think hard about what I was doing when it happened. I think this final bit of FMQ troubleshooting may have solved my problems.
Take a look at the photo below.
Is the embroidery foot in up or down position here?
It looks like both the needle and the open-toe embroidery foot are in the down position, don’t they? Well, they’re not. The foot is still officially up.
I realized that when I press the button to have the machine stop in needle-down position, the foot is also lowered to the fabric. Because the foot looked like it was down and ready to sew, I was skipping the step of actually lowering the foot using the correct button. I believe that is what was leading to my thread breaking after an inch or two.
fixin’ to get ready to FMQ
Now that I’ve worked through all of these technical issues with the machine and my stitches are looking decent on both the front and the back, the only real variable left is me. From here on out, any mistakes are going to have to be considered user’s errors.
If I had known before I started taking voice lessons just how long it would take for singing to become fun again, I don’t know if I would have decided to try. I may have decided to just get by with what I was able to do. Needless to say, I’m glad I pursued formal training because I ended up a whole lot better than I would have been otherwise.
So for all the frustration I’ve experienced at my sewing machine trying to free-motion quilt, I know that on the other side of this effort I’ll feel so much more successful and be more pleased with my quilting because I stuck with it. Now that I know how to practice free-motion quilting, I’m a lot more interested in the results and I’m able to think creatively to solve problems.
If you’re having trouble getting your machine set up for free-motion quilting, take a look at these different aspects and try various combinations until you find what works for you and your machine.
After that, you know what you have to do: Practice, practice, practice!

Join the Conversation!